This post aims to show you the power of raw and how to turn a poor photography into something relatively stunning.
I went through my computer last week and found lots of images from my early days as a photographer. Many of them was terrible and I felt embarrassed. At least I had the decency to (sometimes) photograph in RAW which allowed me to save a few shots. Some of them turned out rather good to be honest. I am actually impressed.
I thought I would show you the power of raw and how to turn a poor photography into something relatively stunning. Let’s have a look at the video where I edit one of the photos.
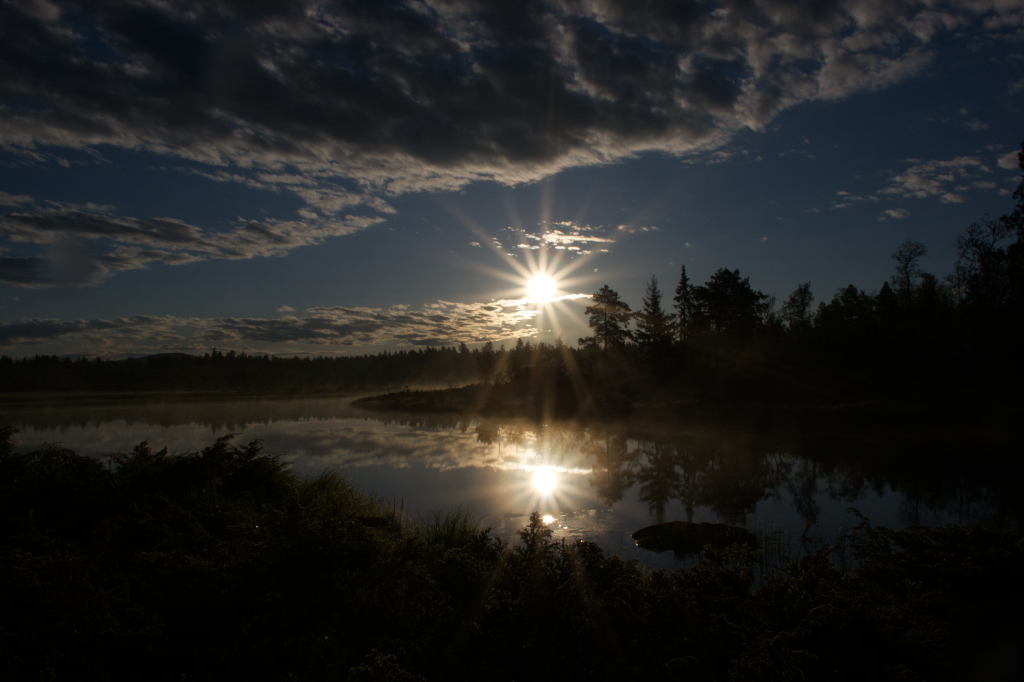
The image below is how the unedited raw image looks. As you can see it’s very underexposed.
When increasing the exposure in an underexposed image (as I did in the video) there’s a risk that noise will start to show in the darker parts of the image. If the noise appears in the corners, you could try to crop the image to get rid of the noise, or try to hide the noise by adding a vignette. If the noise is severe you might want to dial down the exposure all together.
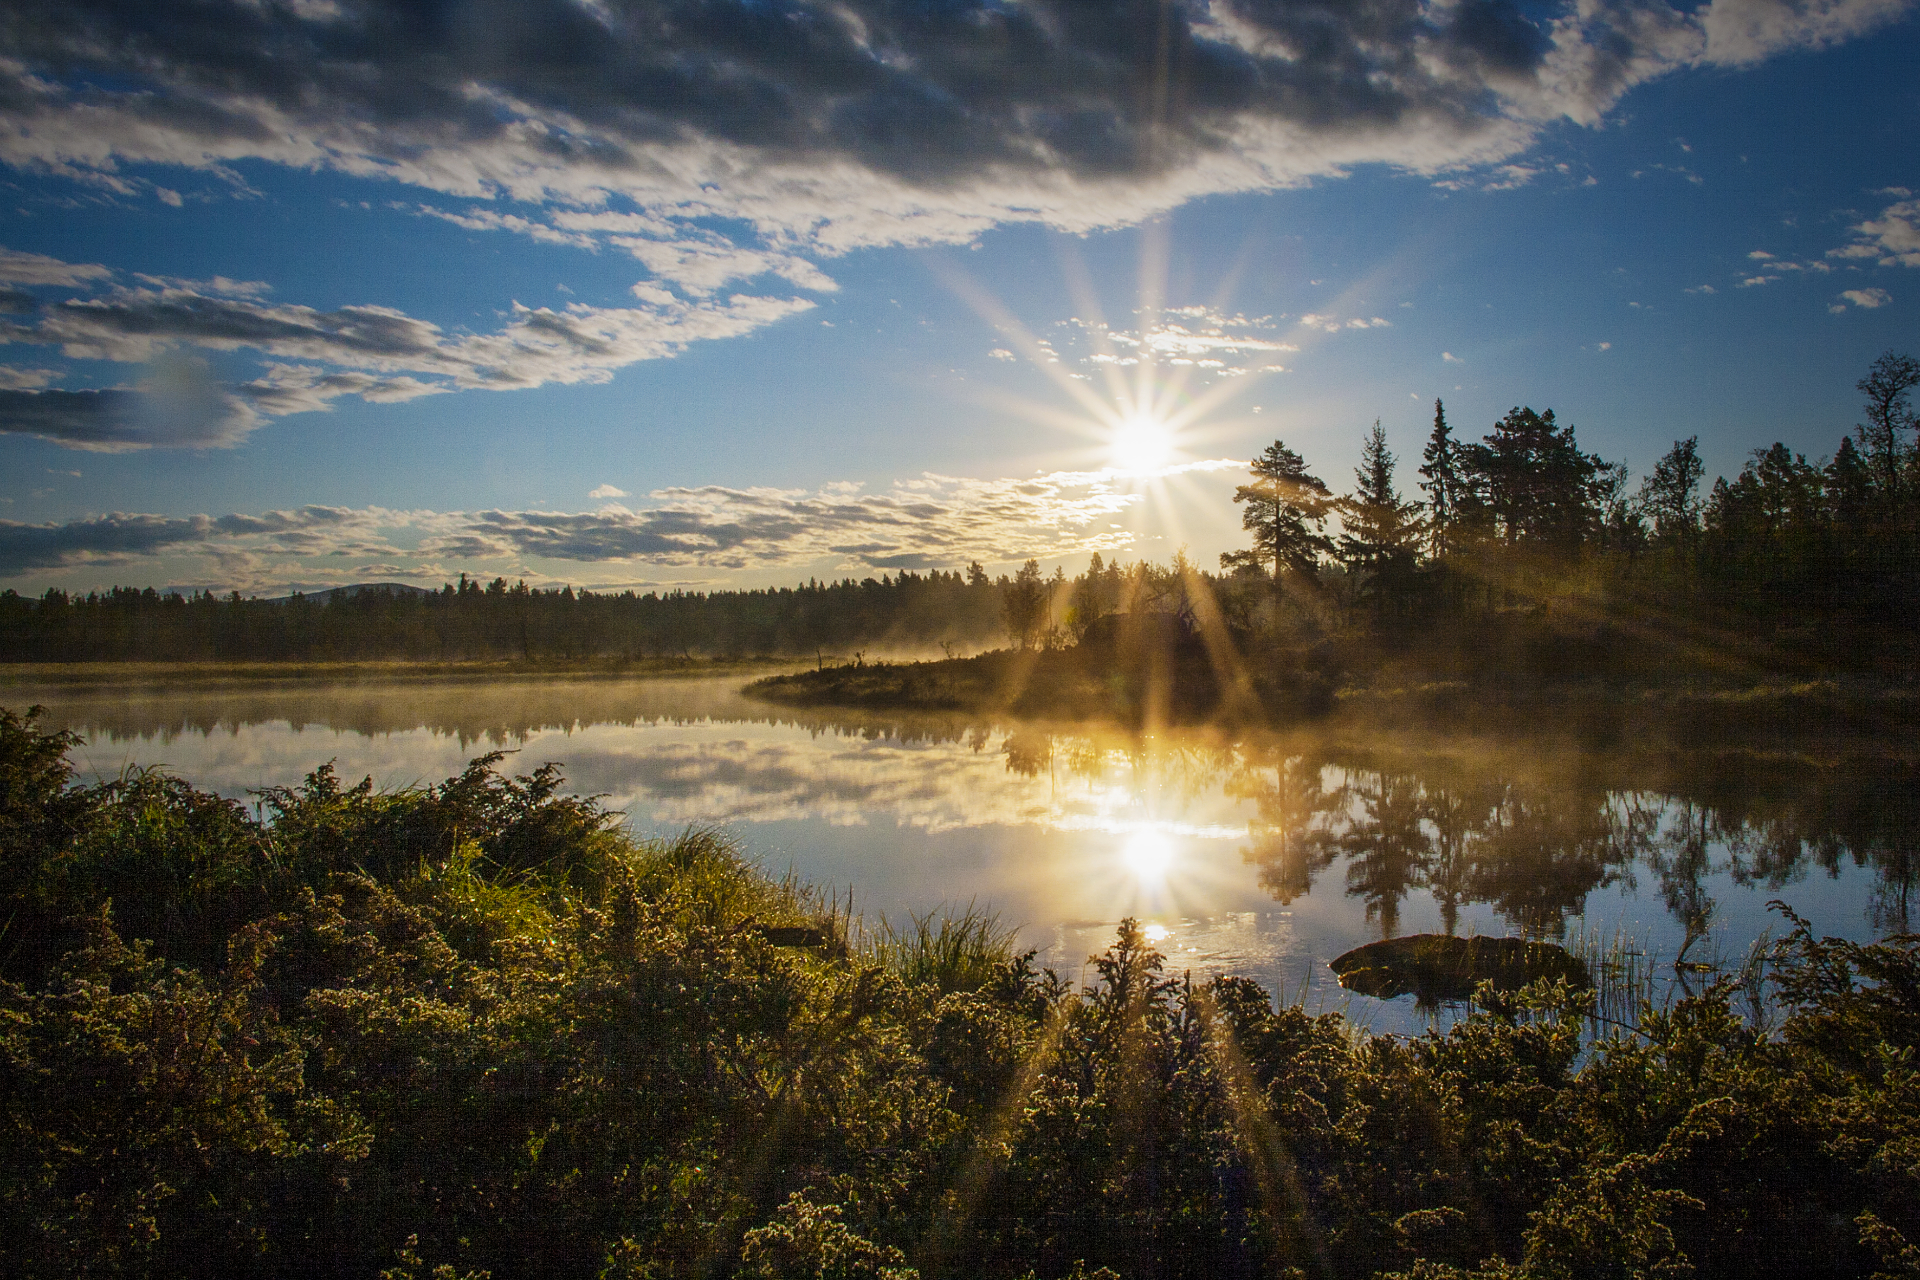
After editing the image, it looks like this. Quite a big difference.

I used a combination of cropping and vignetting in my final result. There’s still a little noise here and there but I can live with that. If not shown in high resolutions, it’s hardly noticeable. You can watch the image in full size if you want to inspect it up close.
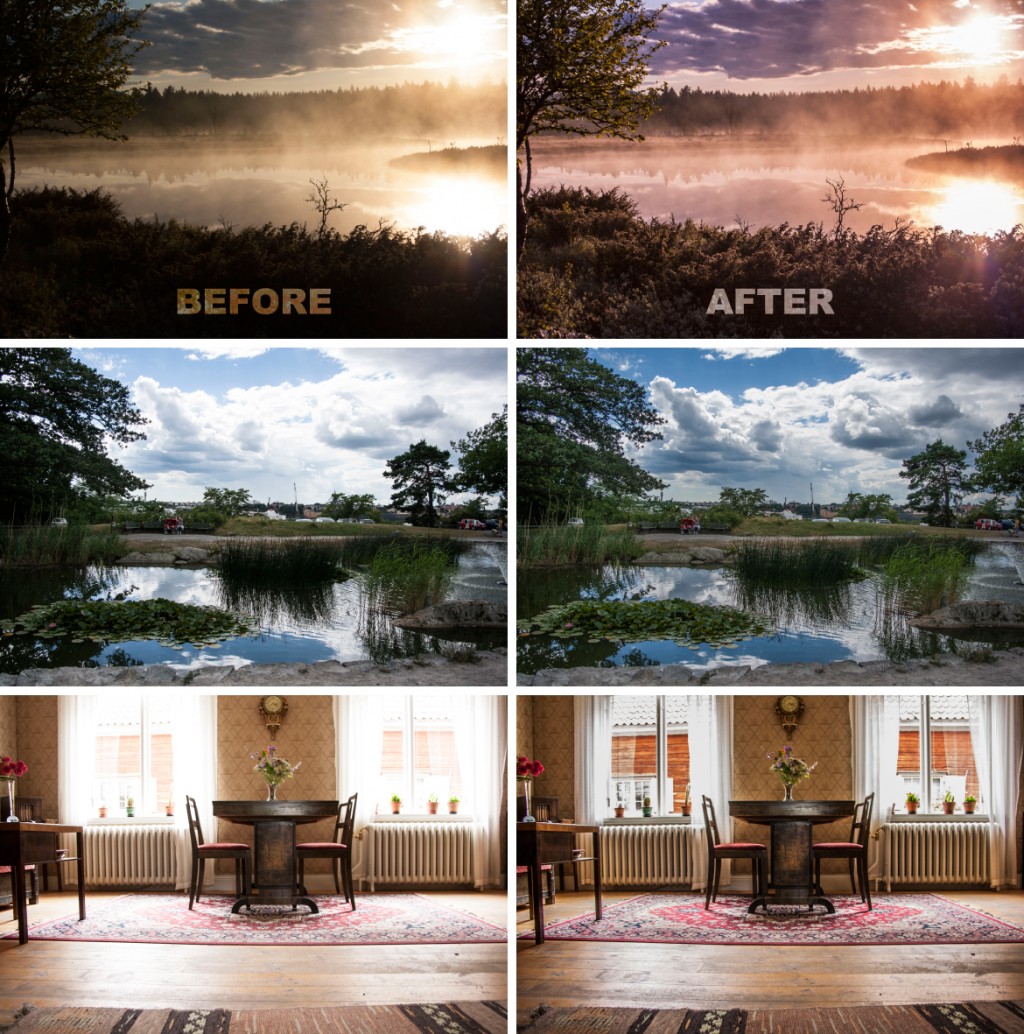
Below are more examples of how an image can be saved if shot in RAW.